The Hows and Whys for Stretching!
Stretching is an exercise which benefits us in amazing ways. Stretching increases our range of motion, decrease pain and can even increase strength.
Why Should We Stretch?
While stretching we are lengthening the muscles in preparation for any type of physical exercise. By stretching before AND after each physical session we improve tissue elasticity, increase our flexibility, prevent injuries, prevent muscle soreness and can increase our physical performance.
The Rules of Stretching:
- Never stretch while cold ! stretching a cold muscle is like trying to stretch an elastic band just after it came out of a freezer ! it won’t stretch very far and it will break very easily, our muscles are the same.
- Start stretching with controlled mild movement of the major joints of the body. This will “warm up†our joints, increasing the synovial fluid throughout each joint. This lubricates the joint in preparation of physical exertion.
- While holding each stretch, do not bounce as it is more likely to cause injuries. Some stretches in specific sports allow bouncing but this is more the exception than the rule.
- While stretching hold the position where you feel a pulling sensation, you do not need to feel pain or discomfort! A slight pull will still give you great benefit and has less likelihood of causing any injuries.
- After exercise we need to stretch! Do a slower exercise to bring out heart rate down to allow the blood to flow back to the proper places and not “pool†in the muscles. If we do not cool down properly before we begin stretching cramping and light headedness is common.
- Hold each stretch for 30 seconds to allow your muscle to fully extend.
Common Stretches:
Neck Stretches
These stretches will work on the Upper Trapezius.
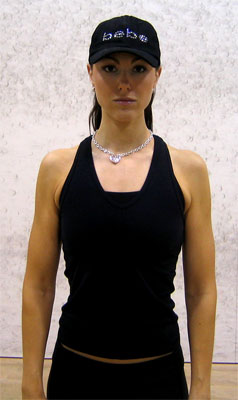 | ||
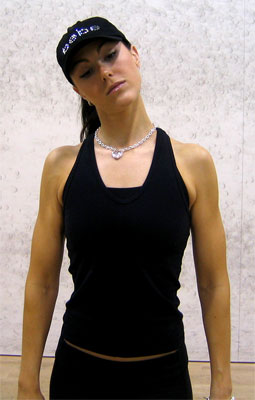
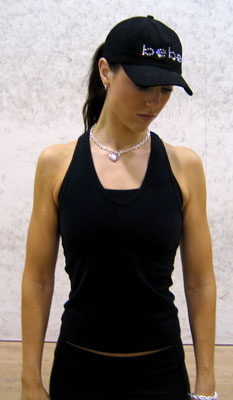
Neck Side StretchBegin with your neck in a neutral position and slowly bring your ear to your right shoulder without moving your shoulder or moving your neck forward. The only movement should be your ear dropping towards your shoulder. Repeat this on the opposite side | Neck Side and Down StretchFor a different neck stretch, slowly move your head towards your shoulder and slightly turn your chin to the same side. | |
 |  | |
Shoulder Stretches: | ||
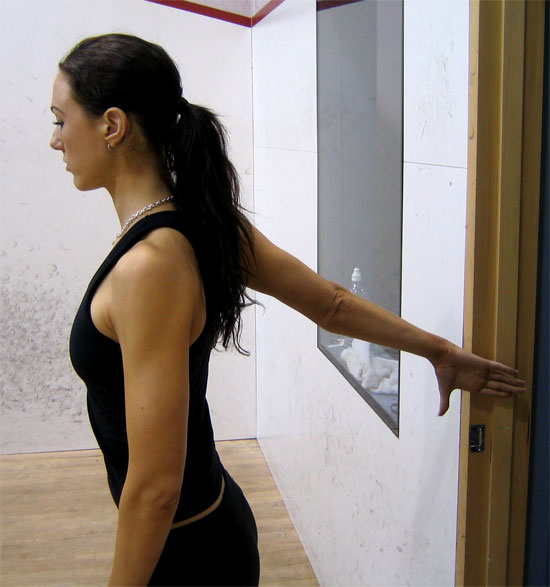
Anterior Deltoid and Bicep Door Way StretchPlace yourself just in front of a door way and extend your hand behind you with a straight arm till your hand is on the door frame. Keep your thumb facing down and your palm facing in. Slowly turn your body in the opposite direction of the door frame, this should give you gentle tension through the front of your shoulder and bicep. | ||
 | ||
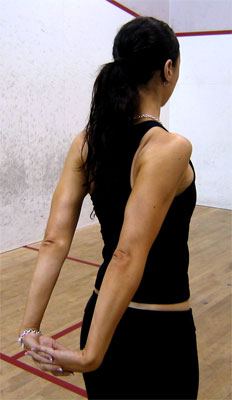
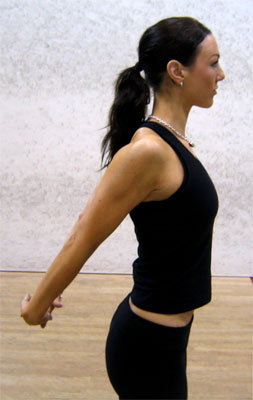
Anterior Deltoid Shoulder StretchWhile standing or sitting clasp your hands behind your back, slowly straighten your elbows and raise your hands while keeping your shoulders back and down. Do not arch your spine (keep a neutral spine). | ||
 |  | |
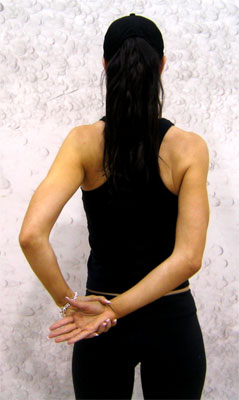
Medial Deltoid Shoulder StretchSimilar to the above stretch, you should have both hands behind your back with one hand holding the other wrist. Pull with your left (straight) arm against your (slightly bent) right arm towards the left side of your body. Repeat this on the opposite side. | ||
 | ||
Tricep Stretches:
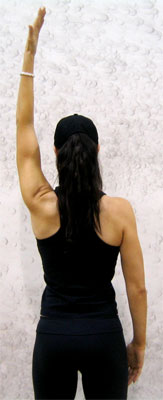
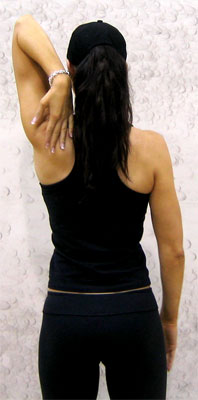
Behind Head Tricep Stretch
Lift your right arm directly above your head and bend your elbow so your forearm is behind your head, use your left hand to pull the opposite elbow towards your head until a stretch is felt on the outside of the arm. Be sure not to “poke†your neck out while performing this stretch.
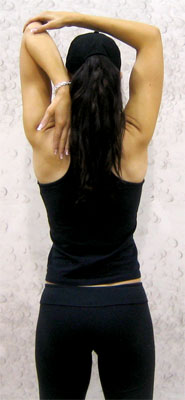
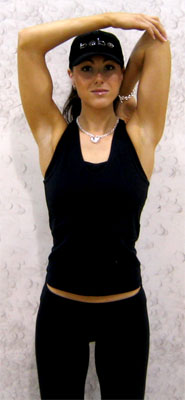
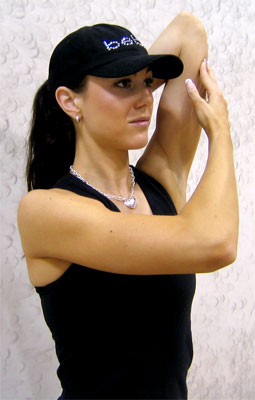
An alternative Tricep stretch for those of us who are less flexible is to place your one arm behind your head as in the stretch mentioned above and then use your opposite arm in front on you in order to push your elbow back.
Back Stretches:
Latissimus Dorsi Stretch
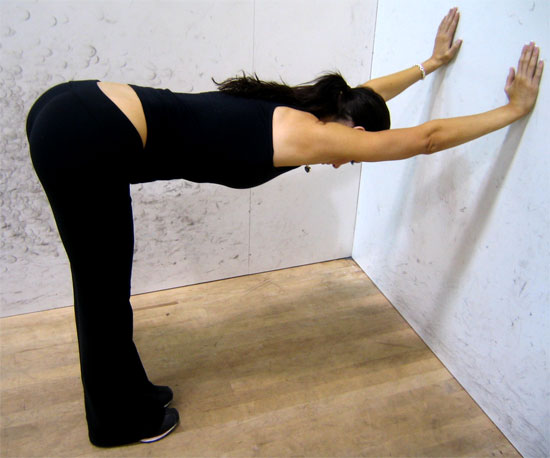
While facing a wall place your palms on the wall level with your hips. While keeping your back flat slowly lean forward while walking back keeping your palms on the wall until you feel a stretch in the sides of your back (your lats).
Prayer Stretch
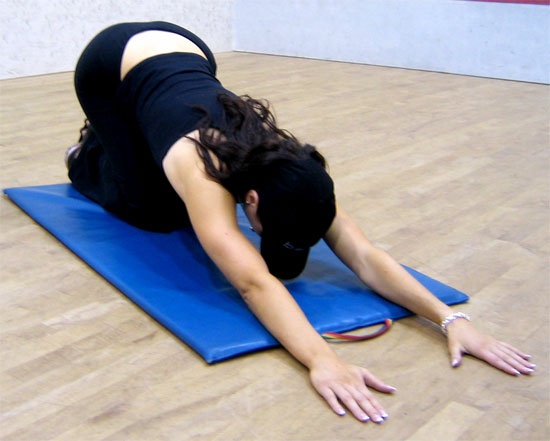
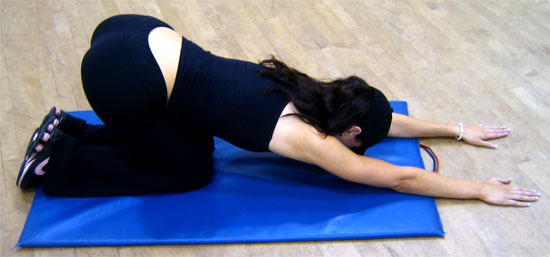
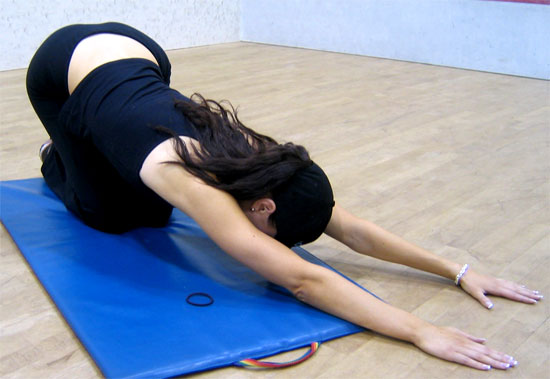
This stretch will help lengthen the Latissimus Dorsi. While sitting in a kneeling position lean as far forward as possible with your arms outstretched and sit down on your heals pressing your chest as close to the ground as possible.
Modified Prayer Stretch
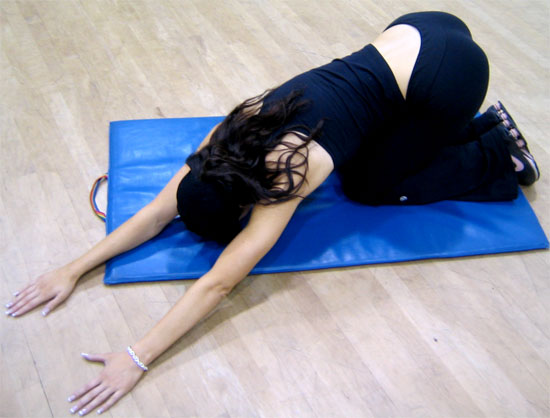
This stretch is similar to the prayer stretch listed above but when leaning forward lean to one side more than the other before sitting down and pressing your chest down. This will increase the stretch to one side of the body.
Upper Back Stretch
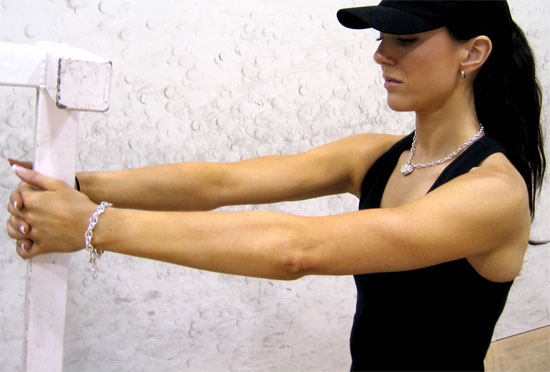
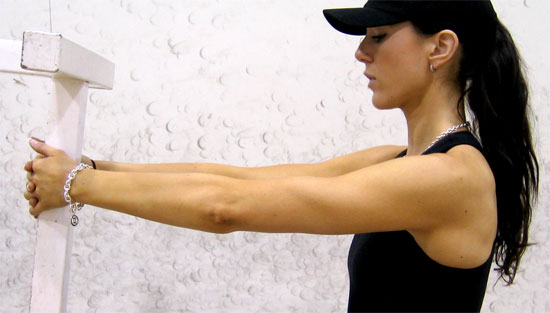
This stretch enables us to stretch our upper back (mainly our rhomboids) by placing our hands around a stationary object (ie tree). Once you have secured yourself to a object gently pull away until you feel a gentle stretch or tension in your back.
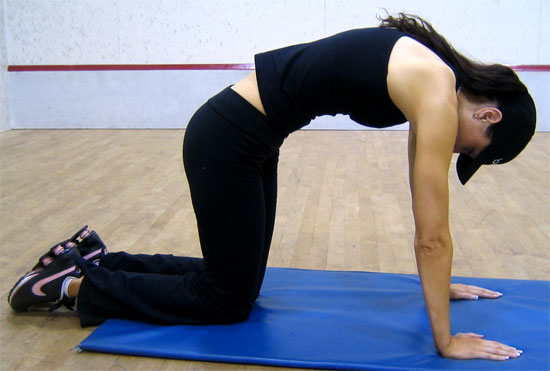
Cat Stretch
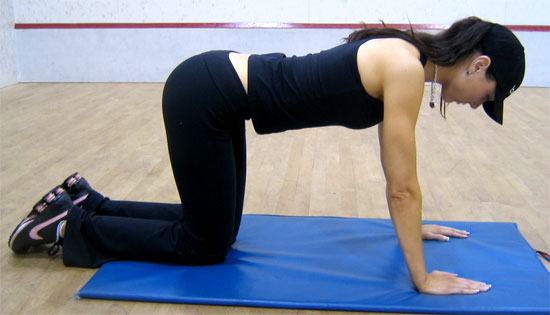
To start this back stretch begin on your hands and knees with your back in a neutral position while keeping your head up. The next part of the exercise has you arching your back up and lowering your head down.
Low Back Stretch
Lay flat on your back and bring your knees to your chest, wrap your arms around the back of your knees and gently pull your knees until a mild pull is felt.
Bum Stretch
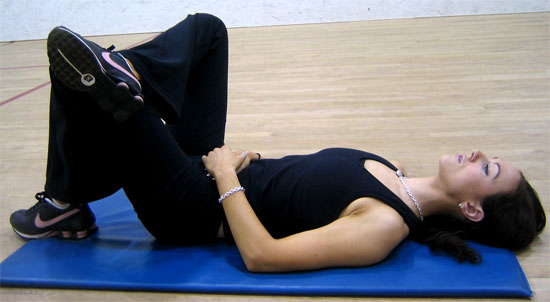
Gluteus Maximus Stretch
While laying on your back bend one knee and cross the opposite foot across your bent knee (looks similar to a 4). While performing this stretch be sure not to place your foot on top of your knee cap.
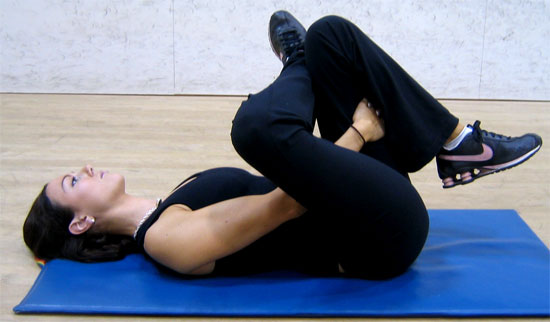
Advanced Stretch
Doing the same as above, once the (4) position has been reached, reach under your bent knee and lift your thigh towards your chest.
Chest Stretches:
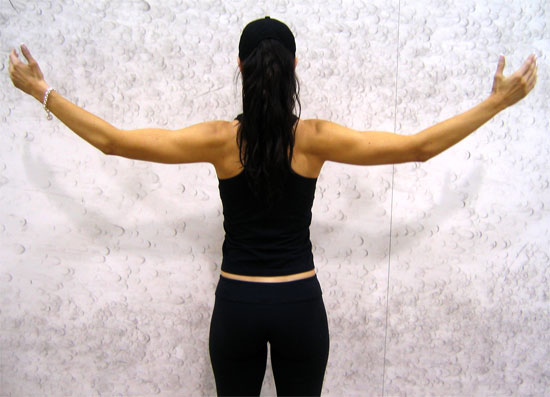
Active Chest Stretch
Start this stretch with your shoulders back and down slowly raising your elbows till they are approximately level with your shoulders. Pull your elbows back till a stretch is felt in your chest. Focus on squeezing your shoulder blades together. This stretch works by actively flexing your back to pull the muscles of the chest into a stretch.
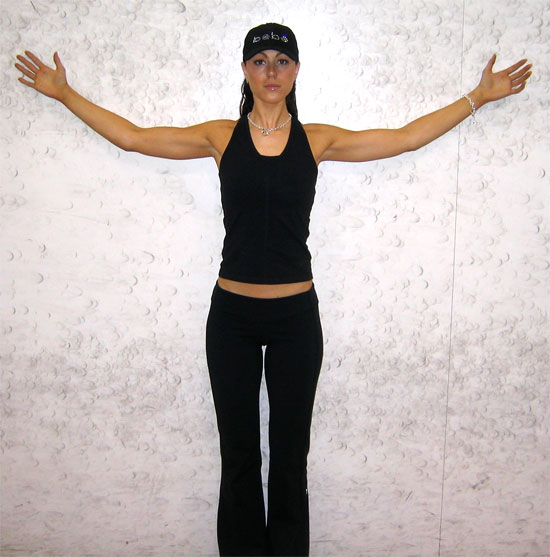
Door Chest Stretch
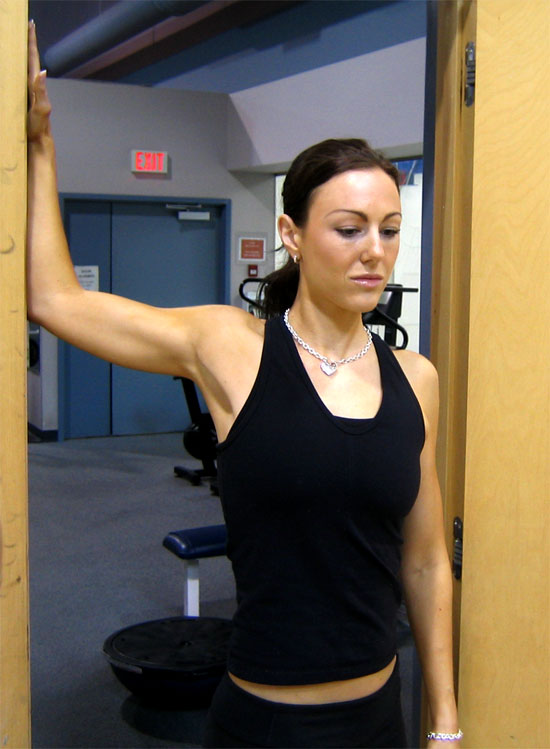
While performing this stretch position yourself in a door way, raise your arm till your elbow and hand are against the door frame. Slowly turn your body away from the door way until a mild stretch is felt. Your elbow can be above your shoulder, the same height as your shoulder or below your shoulder. This creates better flexibility throughout the entire chest.
Abdominal Stretches:
Laying Stretch
During this stretch, lay flat on the floor on your back with your hands extended as far above your head as possible. Think about a string coming out of your hands and your feet which is being stretched or pulled. This stretch is able to loosen up your abdominals by targeting your torso.

Torso Stretch - Cobra
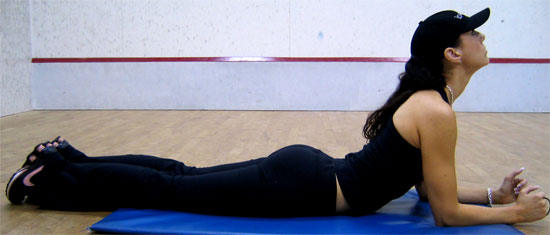
This abdominal stretch is performed while laying on your stomach, place both hands down in front of you and put most of your weight on your elbows. Lift your upper body off the matt while keeping your hips and lower body on the floor. This stretch may also be performed with your weight on your hands in a “push-up†position.
* this stretch should NOT be performed in anyone with low back problems *
Hip Stretches:
Outer Hip Stretch
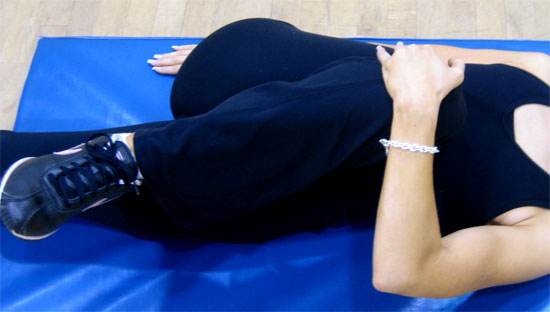
This hip stretch focus’s on the outside of the hip area.
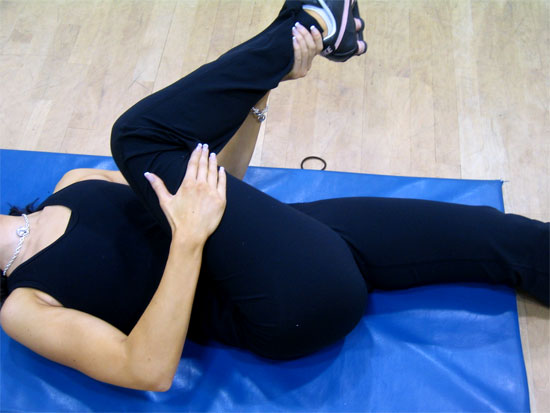
To begin this stretch lay flat on your back with one leg straight and the other leg bent. With the same side arm, pull your bent knee to the opposite side armpit.
Outer Hip – Piriformis Stretch
Follow the instructions above but once you have pulled your bent knee towards the opposite armpit, use your other hand to grab your heal and slightly pull towards your head This will increase the stretch to the Piriformis muscle.
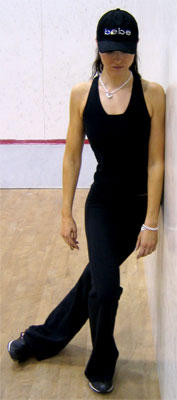
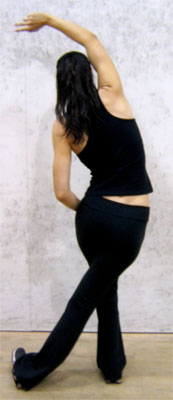
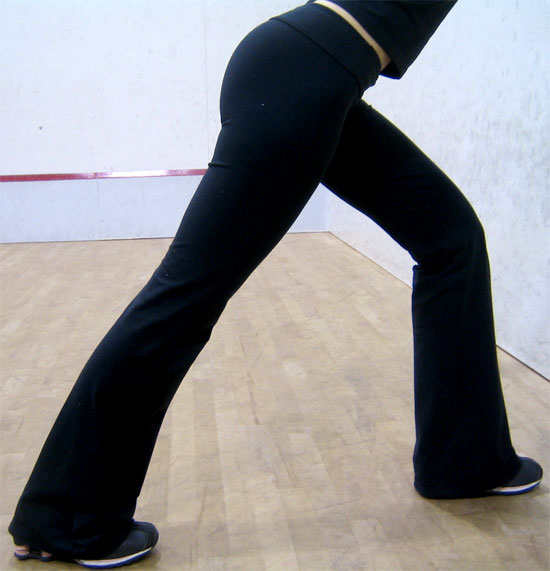
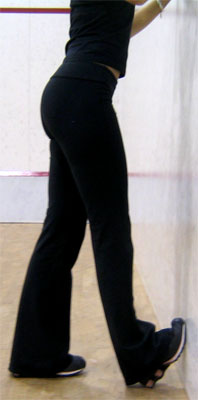
Side Stretch – Iliotibial Band | Side Standing Stretch – Iliotibial Band | |
 |  |
Hip Flexor Stretches
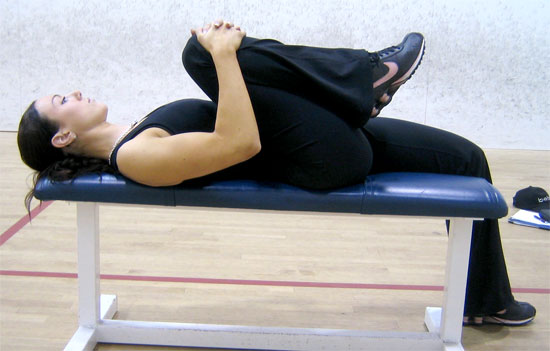
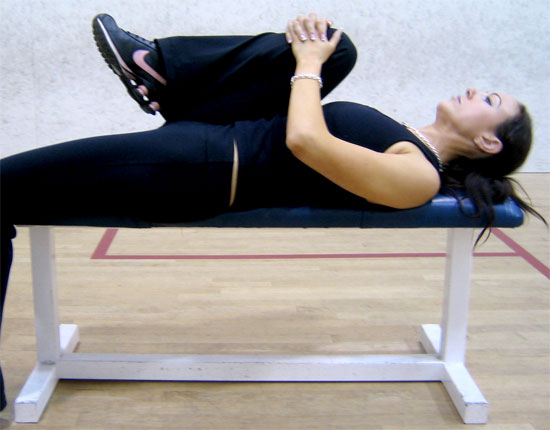
Bench Hip Flexor Stretch
Lie on a flat surface (desk or bench) allowing one leg to hang over the edge. Pull the opposing knee to your chest and concentrate on allowing your opposite leg to hang and relax.
Standing Hip Flexor Stretch
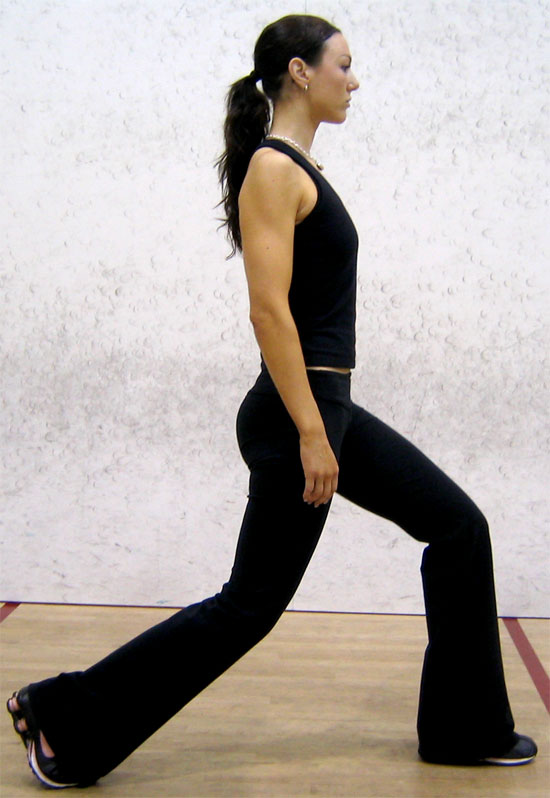
While standing take one large lunge (step) forward keeping both toes pointing in the same direction. Lift the back foot heal off the ground and keep both knees slightly bent with a neutral spine. Tilt your pelvis back until a stretch is felt in the groin/hip areas.
Pretend your hips are a pale of water and you want to pour it out back wards!
Hamstring Stretch:
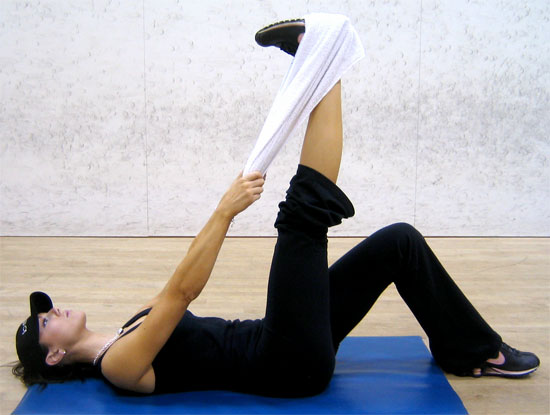
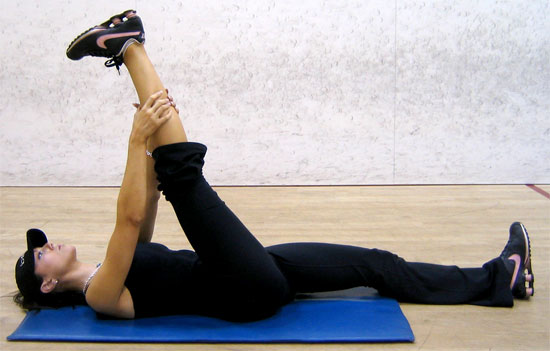
1-Laying Hamstring Stretch
There are 3 different levels of this hamstring stretch
Beginners – lay on your back with one bent leg on the floor, the other leg in the air. Wrap a towel around your heel and slowly pull your extended leg towards your head until you feel a mild pull.
Moderate – begin by laying on your back with one leg laying flat on the floor and the other leg in the air. Wrap your hands around your thigh and pull the leg in the air towards your head until a stretch is felt in the back of your leg.
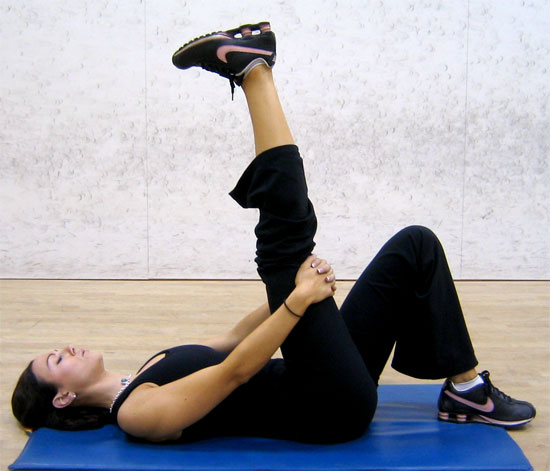
Advanced – begin the same as in the moderate stretch but extend your hands around your calf and pull your calf down towards your head until a mild stretch is felt.
2-Standing Hamstring Stretch
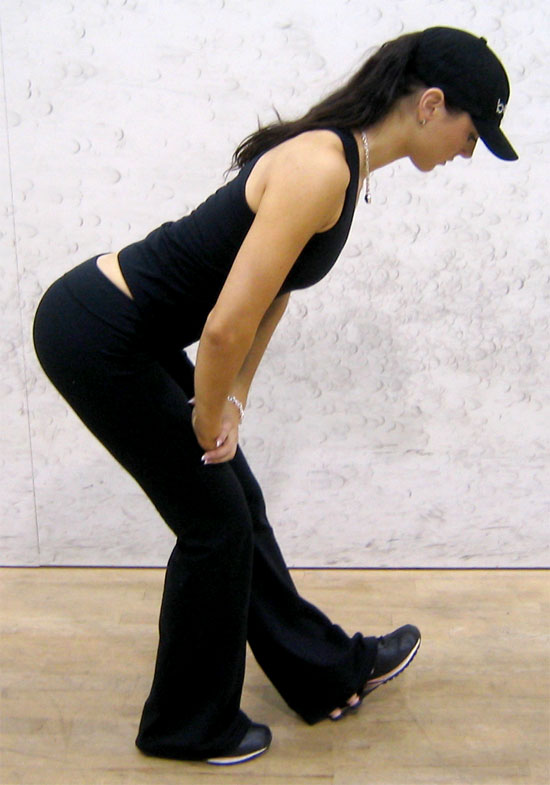
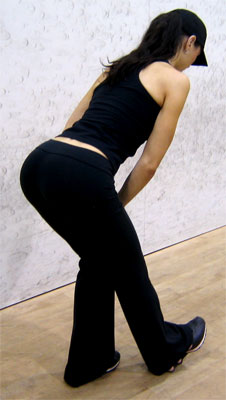
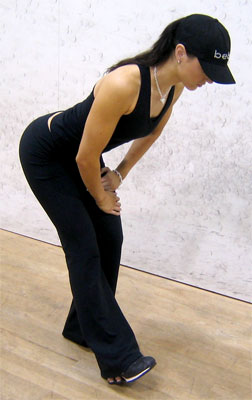
When attempting this stretch start in a standing position and place one foot forward with your heal on the floor and your toes pointing upwards. Keep your knees together and place both hands on your bent leg just above your knee. Slowly hinge forward at your hips keeping a neutral spine trying to push your tail bone upwards. The stretch will be felt in your straight leg.
Quadriceps Stretch:
Standing Quadricep Stretch
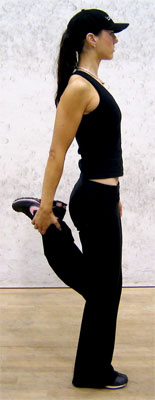 While standing, find your balance (or hold something to secure yourself) and bend your knee lifting your leg behind you. Hold your ankle and lift till foot is directly behind you. Push your hips forward and hold this position for 30 seconds.
Calf Stretches:
Wall Calf Stretch
To stretch your calf, begin by using the wall or a chair as support. Place one foot behind the other with your front knee bent slightly and your back leg straight with it’s heal down. Begin the stretch by leaning your hips forward until a mild stretch is felt.
A beginners option for this stretch is to use a towel wrapped around your ankle to help hold the stretch.
To change and isolate either the Gastrocnemius or Soleus you can alternate the wall calf stretch by bending the rear leg slightly. This helps isolate a different muscle!
Stair Calf Stretch
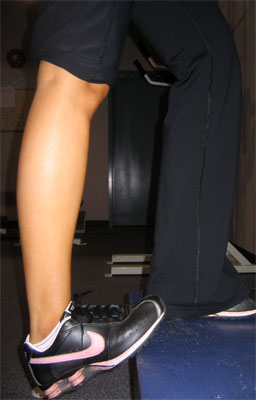
This stretch needs you to be standing on a stair case where you can allow your heal to bend down below the level of your toes. While holding onto the wall or something else secure, slowly let your calf relax until it drops below the levels of your toe and you begin to feel a pull in the calf area.
- Login to post comments